Two weeks ago, the InstaVR team had the pleasure of showcasing our solution at Autodesk University 2016 in Las Vegas. We also used the occasion to publicly announce our compatibility with cubemaps, particularly those rendered using Autodesk A360.
Why is this a big deal?
Virtual Reality is of great interest to Autodesk clients. There were no shortage of Gear VRs, HTC Vives, and Google Cardboards at the Exhibition Hall. The platform is a great way for engineers, architects and construction designers to visualize before building. Becoming fully immersed in a world, as opposed to a limited 2D view on a computer screen, has enormous benefits.
One of the limitations of working in 3D rendered environments is how do you share your creations with the rest of the world? Whether you're using Autodesk, Lumion, VRay, OTOY -- you want to be able to share your work. Not every partner or client will have the same software as you, so distribution is a key hurdle.
Enter InstaVR.
InstaVR allows you to upload equirectangular (Autodesk 3ds Max, Autodesk Maya) or cubemap (Autodesk A360) based renders, augment them with navigation + hotspots, add an app logo & home screen, and then publish cross-platform with a single click each (Apple iOS, Google Android, Gear VR, Google Cardboard, embeddable web).
Below is our How-To Guide on turning your cubemaps into distributable VR apps. H/T to Mark and Simon on our engineering team for putting together this handy guide.
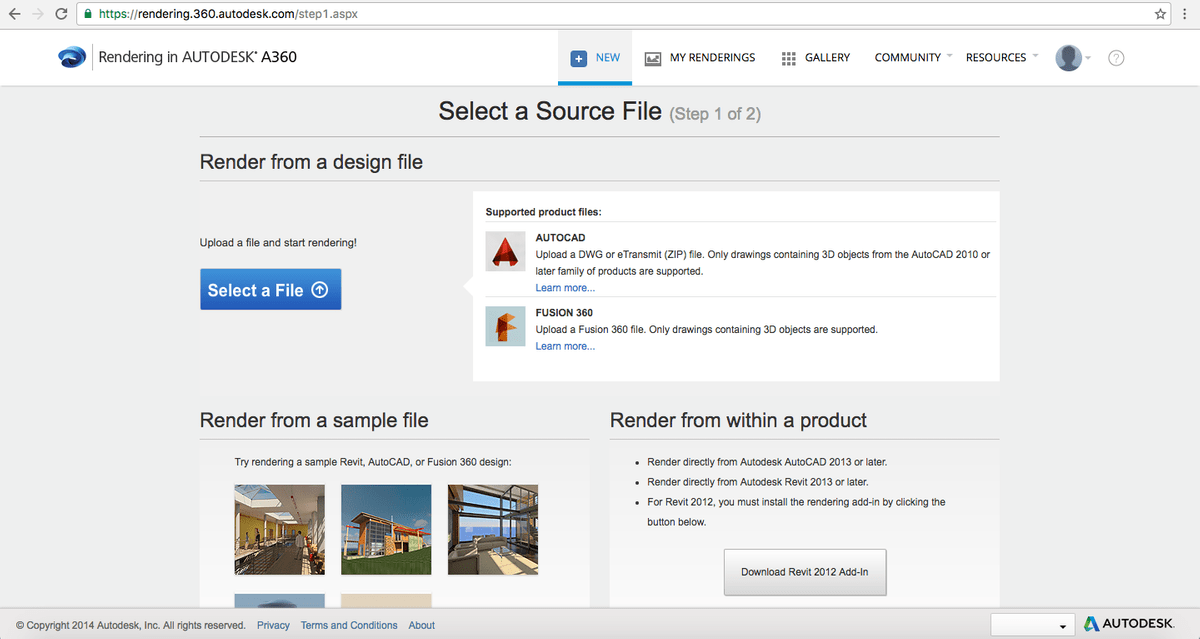
How to render .dwg file in Autodesk:
- Signup to https://rendering.360.autodesk.com/
- After successfully signup, Login to 360 Autodesk.
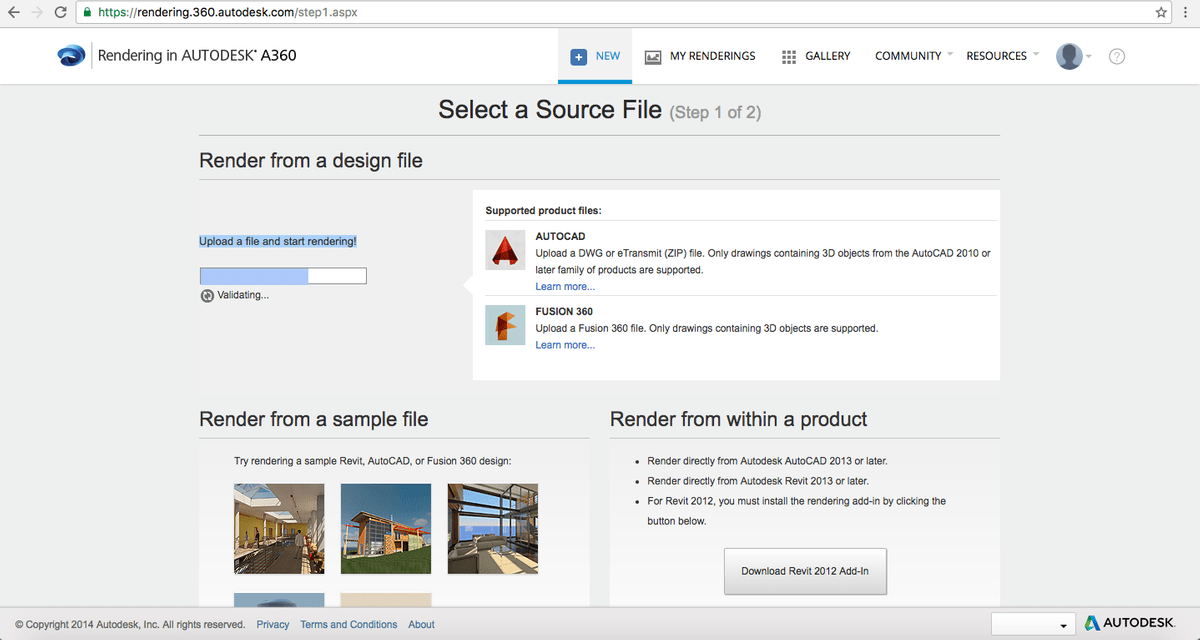
- Select "New" from Menu options → Upload .dwg file and start rendering! by click on "Select a File" button.
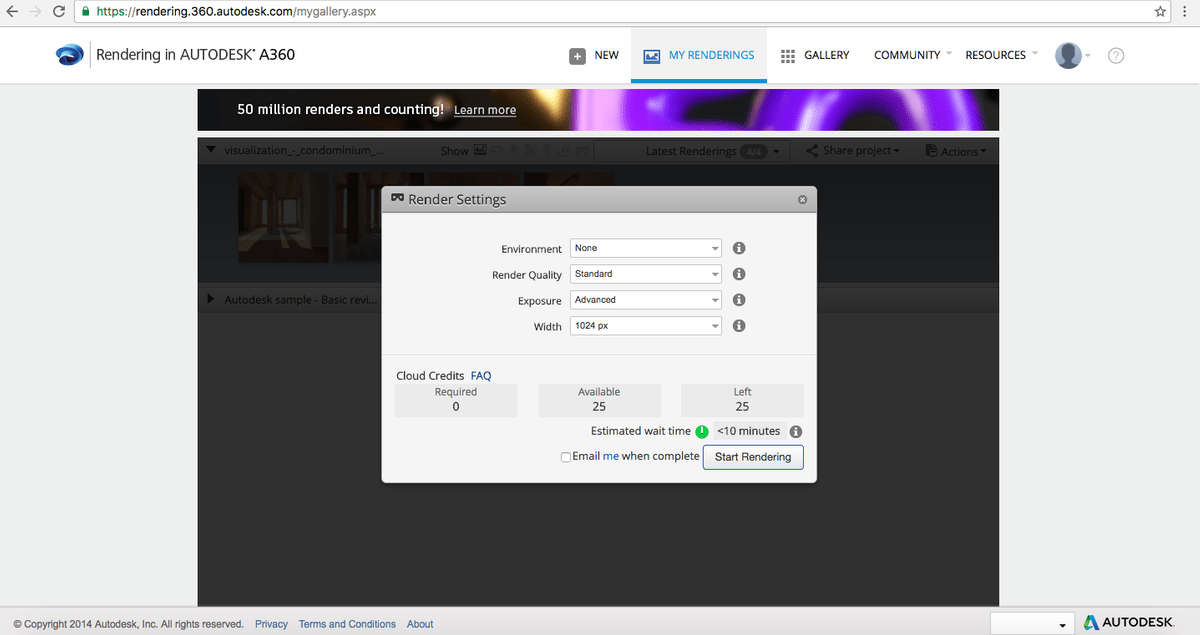
- Apply Render Settings.

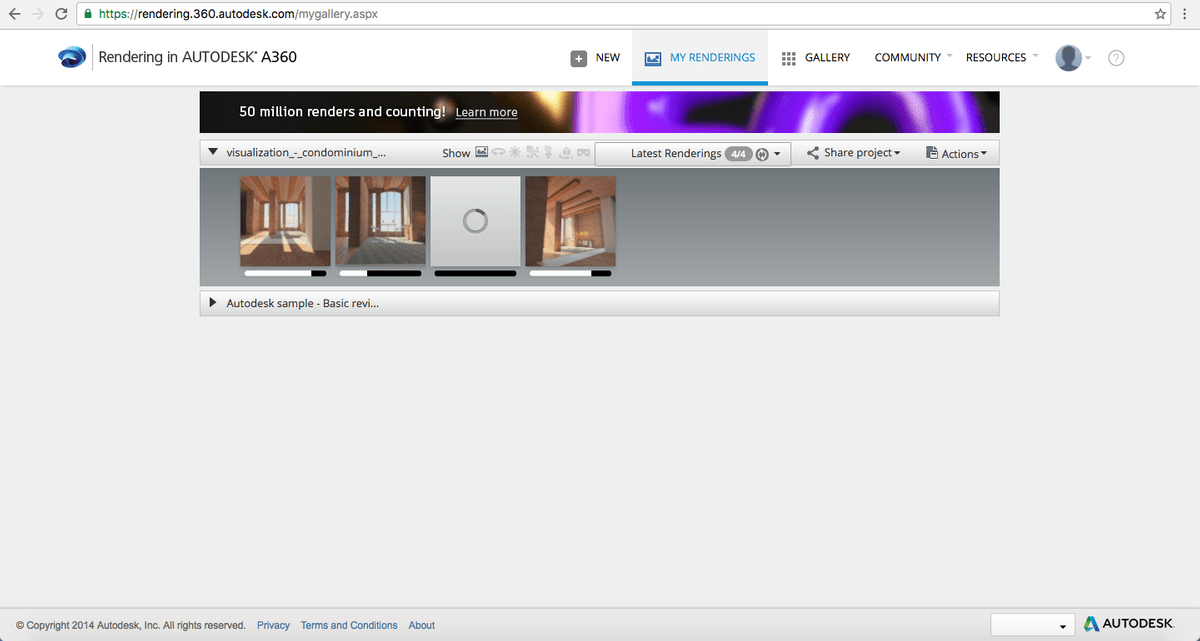
- Clicking "Start Rendering" will start rendering .dwg file under "My Renderings".
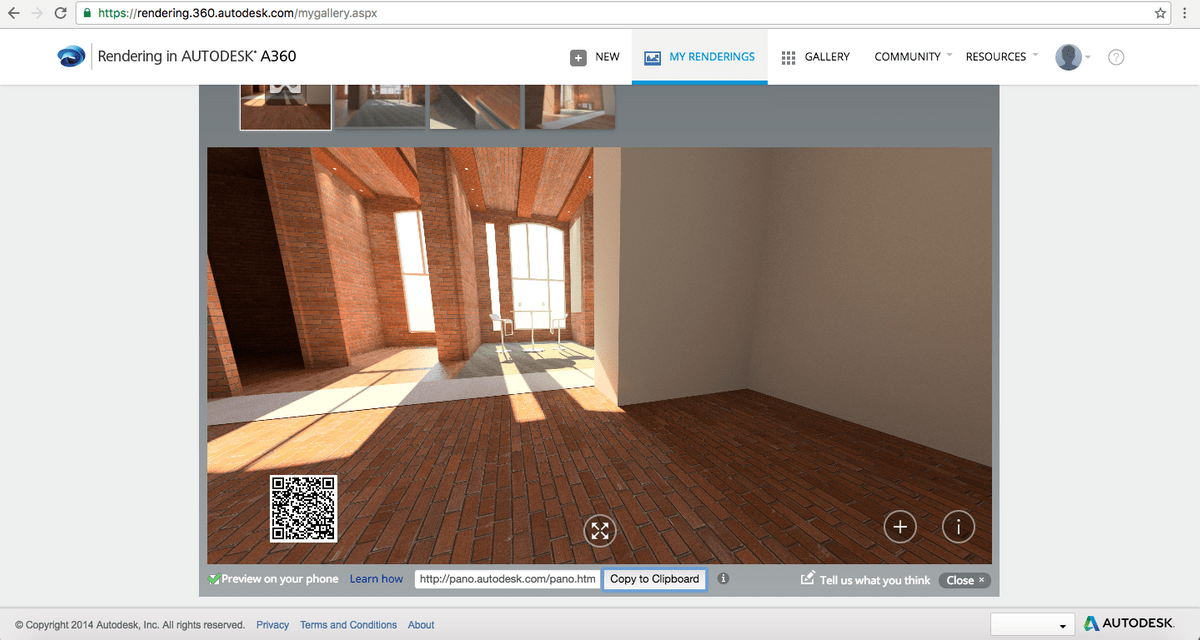
- Hover over View → Select "Render as" → Select "Stereo Panorama".

- Apply Render Settings.
- Click on "Start Rendering" will start process for Render under "My Renderings".
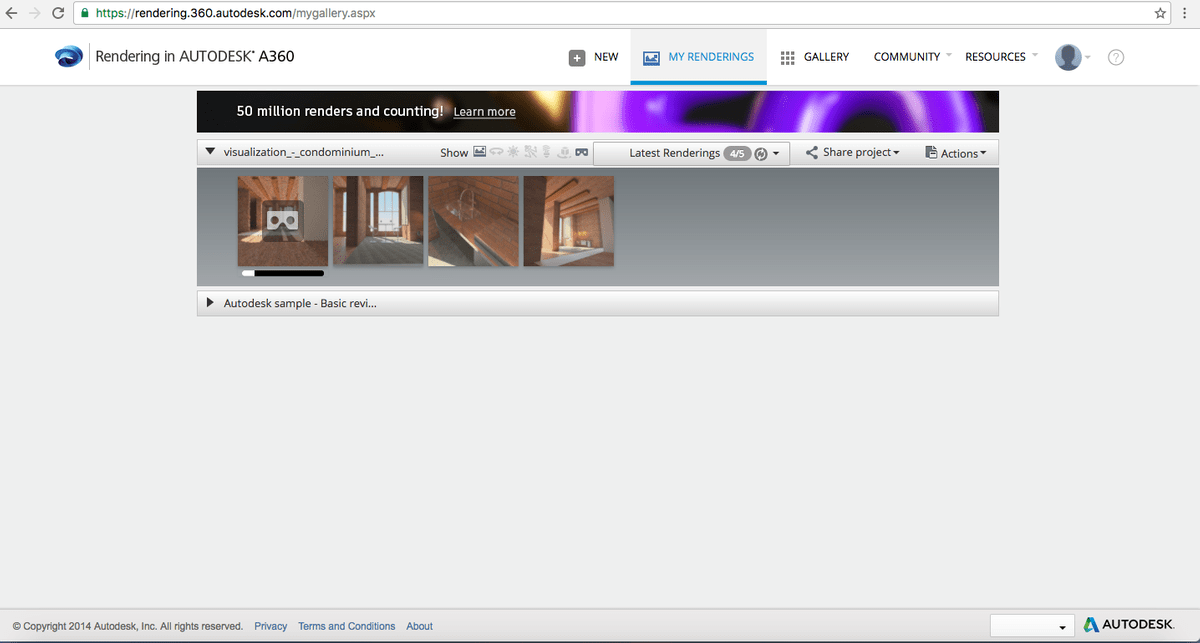
- Once Render finishes, click on thumbnail to preview.
How to Incorporate Autodesk Stereo Cubic Panoramas Into InstaVR
Download Stereo-Pano as Zip (It will download as "6 cube" & "6 cube x 2" cubic image).

6 cube x 2
Download Stereo-Pano as GearVR (It will download as "12 cube x 1" cubic image)

12 cube x 1
Note: InstaVR supports the following Resolution for Stereo Cubic Panorama
- 12x1 cubemap (Stereo cubic panorama) - 49152 x 4096 (48K X 4K)
- 6x2 cubemap (Stereo cubic panorama) -24576 x 8192 (24K X 8K)
- InstaVR is compatible with 360 stereo cubic panoramas rendered from various 3DCG software such as Autodesk A360, Lumion, OTOY OctaneRender, VRay, etc.
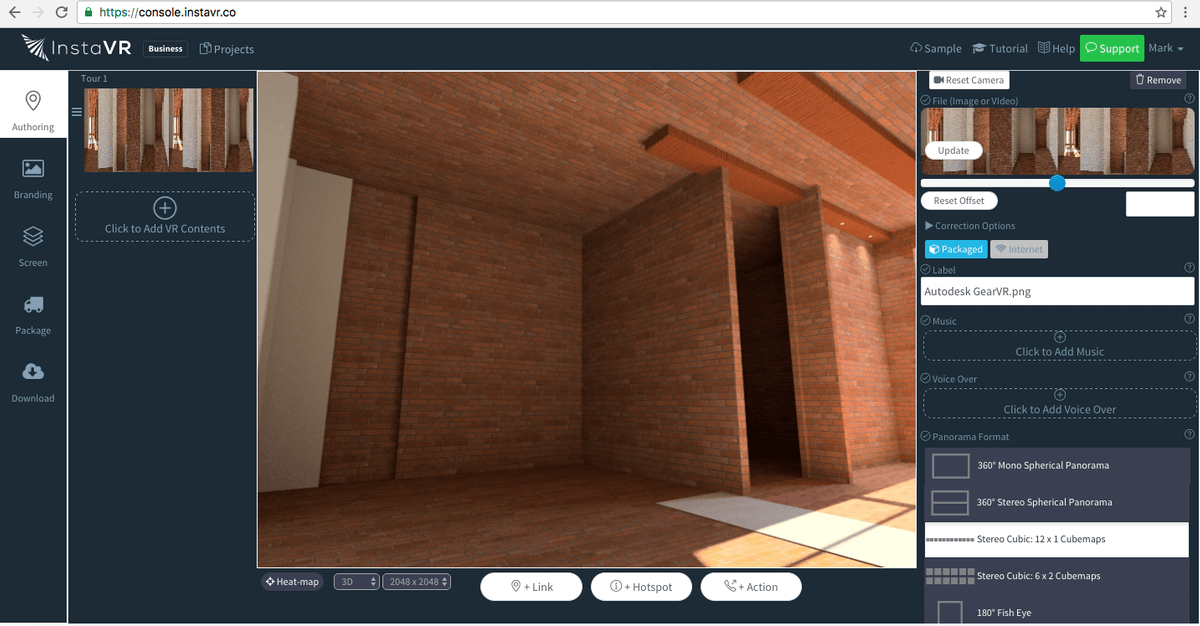
- Login to InstaVR with valid/registered credentials.
- Create New Project → Upload VR Scene (Rendered via 360 Autodesk).
- By default "360 Mono Spherical Panorama" is selected in "Panorama Format" options → Select appropriate Panorama Format
(e.g. For 12 Cube image - Stereo Cubic: 12 x 1 Cubemaps & For 6 cube x 2 image - Stereo Cubic: 6 x 2 Cubemaps) - View 12 x 1 or 6 x 2 image in InstaVR Dashboard preview.
- Follow Example for InstaVR dashboard preview after Upload 12 x 1 Cubemap Image.
- Enter required information in Branding, Screen tabs.
- Publish package for respective platform (e.g. Android, iOS, GearVR & Web).
- Download and Install published packages on respective devices (e.g. Android, iOS, GearVR & Web).
- Launch application on respective devices (e.g. Android, iOS, GearVR & Web) and view tour.